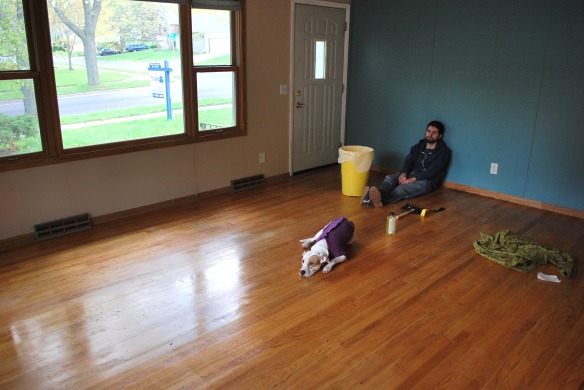
Ahh, the living room. The gathering room. The conversations. The movies. The winter snuggling. The reading. The playing. With so many good memories about to be made in this room, we placed a lot of our initial energy on whipping it into shape.
It really wasn’t a pretty sight at the beginning. I mean, you saw the horrific before photo of the living room, right? Here’s a refresher if you missed it:

EEGADS, am I right? (Again, please remember, this photo is from the listing of our house–that is not our furniture or stuff!!)
One of the things on our required list (we really should post that full list sometime!) was wood floors in most of the house. The listing for our house boasted wood floors throughout the main floor (except kitchen & bathroom); however, the living room, hallway, and one bedroom were covered in hideous carpet when we were looking at the house. And we couldn’t pull it back to check out the condition of the floors, so we were really anxious to do just that once the place was ours. (Side note: this stressed me out to no end. I had nightmares of pulling back the carpet only to find no floor at all– just a deep hellish pit).
Immediately after closing on the house, we went to our apartment to scoop up Ms. Willa and then drove her to her new house for the first time. After enjoying her first run in the yard (video of that rompus event here), we went inside and started thrashing at the carpet (aka the scourge of our 1960’s ranch). I mean, my heavens. Look again at that carpet. You have to wonder.
Mr. hubby had bought me a prybar weeks prior to get me pumped about ripping up the scourge, and boy did we whip that sucker out right away! And…we found….
The only real problem was, for goodness sake, the installers of the carpet went way overboard with stapling the carpet pad STRAIGHT INTO THE FLOOR. First of all, I’ve never even seen staples in the pad like that. The weight of the carpet which is secured by the tack strips around the perimeter of the room ought to suffice, right? And if you would want a little more reinforcement, I could understand putting one modest staple in each corner or something. Maybe even a few sporadic staples. But these people? They stapled just about every inch all the way around the perimeter AND down the middle of the floor wherever they had strips of pad. Did I mention they stapled right into the floor?
It really was hard work. Lanny pulled up the tack strips with the prybar and hammer as I yanked out the staples with a flathead screwdriver and pliers. Word to the wise: if you ever face the task of ripping out tack strips, do take the time to put something (cardboard, wood, rubber) under the prybar or whatever you’re using to protect the floor from dents when leveraging. As for the staples, my preferred method was grabbing on with the pliers and pulling up. You’ll find a rhythm to the madness. Also, I think technically it’s advised to pull out the carpet and pad entirely before getting into the hard work, but we just rolled it back as we went.
The good news is, when there is the promise of hardwood floors, you really can’t keep the ZH fam down, so we powered through until every last blasted staple was pulled and all the tacks were trashed. With blistered hands and excitement, we took some moments to revel in the fruits of our labor.
The end result is definitely less impressive than the initial corner we had pulled back as there are scratches and dull spots basically everywhere. But, we polished ‘er up with some olive oil and lemon juice, and she’ll do just fine until we can refinish it later on (way, way later on). Even with all the scratches, I will never understand why anyone would’ve covered up that floor. Incomprehensible.
Now, moving along, let me call your attention to the second bane of the living room’s existence. AKA, these guys:
I swear to you, these shook me to my core so deeply that, again, nightmares ensued. And as it turns out, getting decent blinds custom fitted is pricey. And so are curtains. As I am wont to do, I agonized over the decision for weeks, but, finally mostly out of desperation, we together decided to go for curtains for now. After having lived in the house for 2 months with those blinds, I think I may have been even more excited about getting rid of them than the carpet.
This post is getting long, so without further ado, let me show you where we’re at today with the living room. We’ll do a full post on hanging curtains, our paint colors, and other designy things at some point as well, but I wanted to get an “after” pic (which is actually an “in progress” pic) up since it’s been requested.

An honest picture of where we’re currently at with the living room (complete with clutter on the surfaces!).
Enjoy! We’re still not finished, but at least the nightmares about floor pits and armies of devious seashells have stopped! And really, can you believe that is the same room? More pictures & tales to come!
Post by Amanda


